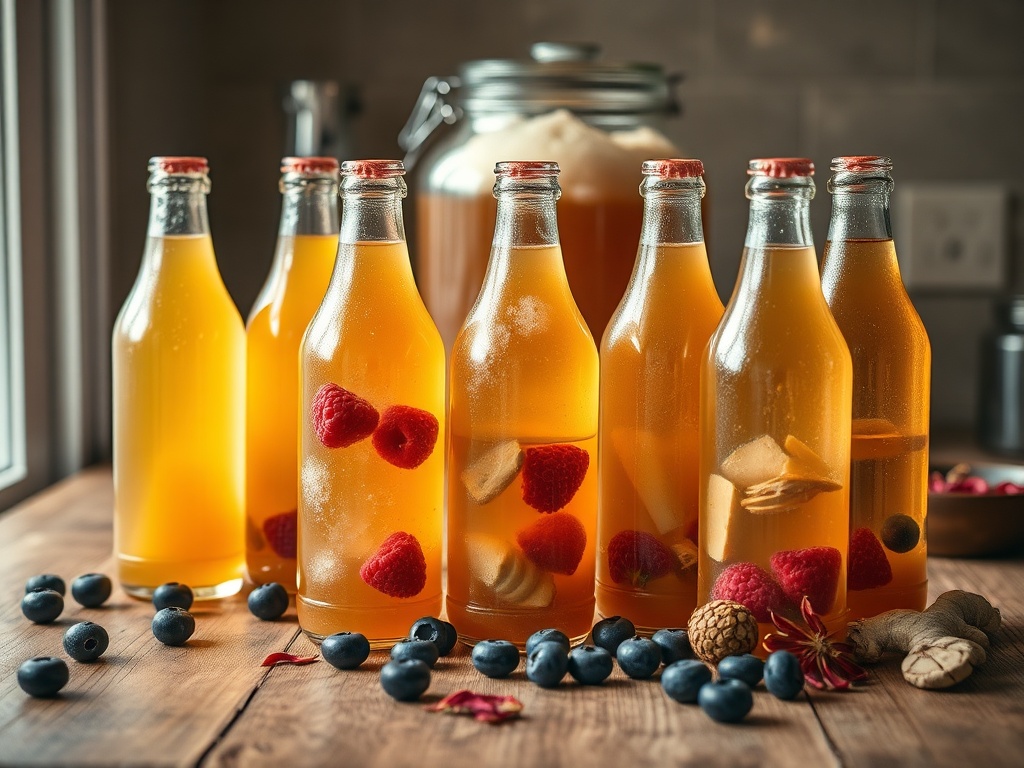
Key Takeaways
- Second fermentation requires airtight bottles, 2-7 days of room temperature storage, and added sugars or fruit to feed remaining yeasts
- Flip-top glass bottles rated for carbonation are the safest choice, preventing dangerous bottle explosions from built-up pressure
- Burping bottles daily during the first 3 days releases excess CO2 and prevents over-carbonation
- Fruit additions provide natural sugars and flavor compounds, with berries and ginger being the most effective for carbonation
- Temperature between 68-78°F (20-26°C) produces optimal carbonation speed and flavor development
- Refrigeration after second fermentation halts the process and preserves your desired carbonation level
Why Second Fermentation Matters for Kombucha
Second fermentation transforms basic kombucha into a sophisticated probiotic beverage with restaurant-quality carbonation and complex flavor layers. While first fermentation converts sweet tea into tart kombucha through SCOBY-mediated bacterial and yeast metabolism, second fermentation creates the effervescence and flavor depth that defines premium kombucha.
The process works through a simple principle: trapping carbon dioxide. During first fermentation in an open or cloth-covered vessel, CO2 escapes into the air. In sealed bottles, that same CO2 has nowhere to go. According to Kombucha Brewers International, dissolved carbon dioxide reaches 2.5-4.0 volumes in properly executed second fermentation—comparable to commercial soda and champagne.
Second fermentation also develops flavor complexity impossible to achieve in primary fermentation. Fruit additions undergo enzymatic breakdown, releasing esters, terpenes, and phenolic compounds that create layered taste profiles. The slightly acidic environment of kombucha accelerates this extraction, creating bold fruit-forward profiles or subtle botanical notes depending on your additions.
What Equipment Do You Need for Second Fermentation?
Choosing the right bottles is not just about convenience—it's about safety. Kombucha second fermentation generates significant pressure, and using inappropriate containers can result in dangerous explosions. The Cultures for Health brewing safety guidelines emphasize using only bottles designed to withstand internal pressure.
Best Bottles for Kombucha Second Fermentation
| Bottle Type | Pressure Rating | Best For | Drawbacks |
|---|---|---|---|
| Flip-top glass bottles (Grolsch-style) | High (80+ PSI) | Reusable, airtight seal, easy to burp | Higher upfront cost |
| Swing-top bottles (ceramic cap) | High (80+ PSI) | Traditional aesthetic, excellent seal | Harder to clean narrow necks |
| Recycled GT's kombucha bottles | Moderate (60 PSI) | Free, proven safe for kombucha | Metal caps degrade over time |
| Wine bottles with cork | Low (30 PSI) | Widely available | Not recommended—cork can blow out |
| Mason jars with metal lids | Very Low (15 PSI) | None for carbonation | Unsafe—glass can shatter |
Always use thick-walled glass bottles specifically designed for carbonated beverages. Bottles should hold 12-16 ounces for optimal carbonation control—larger volumes build pressure more slowly, while smaller bottles carbonate too quickly and are harder to burp safely.
Additional Equipment Checklist
- Funnel with wide mouth for transferring kombucha without spillage
- Fine mesh strainer to remove SCOBY particles and yeast strands before bottling
- Measuring cups for precise fruit and sugar additions
- Labels and permanent marker to track fermentation start dates and flavor variations
- Bottle brush for cleaning narrow-neck bottles between batches
How to Prepare Your Kombucha for Second Fermentation
Second fermentation begins when your first fermentation reaches the right balance of sweetness and acidity. Timing this transition correctly determines your final carbonation potential and flavor outcome.
When Is Your Kombucha Ready for Bottling?
First fermentation is complete when your kombucha tastes pleasantly tart with a slight residual sweetness—not vinegary. This typically occurs after 7-14 days at room temperature, though timing varies with temperature and SCOBY activity. Test by tasting daily starting on day 7: you want noticeable tang but enough sweetness that you'd happily drink it unflavored.
The residual sugar content matters enormously for second fermentation. According to Kombucha Kamp fermentation research, kombucha with 2-4% residual sugar creates optimal carbonation during secondary fermentation. Too sweet and you risk over-carbonation; too tart and insufficient sugar remains to feed yeasts and generate CO2.
- Remove the SCOBY and set aside 2 cups of finished kombucha as starter liquid for your next batch
- Pour the remaining kombucha through a fine mesh strainer into a large pitcher or bowl
- Taste and assess: it should be tart-sweet, not cloying or vinegary
- If too sweet, allow first fermentation to continue 1-2 more days before bottling
- If too tart, add 1-2 tablespoons of sugar per gallon when bottling to provide yeast fuel
Step-by-Step Second Fermentation Process
Second fermentation follows a precise sequence that balances carbonation development with flavor infusion while maintaining safety throughout the process.
Step 1: Choose Your Flavoring Strategy
Flavorings serve dual purposes: they add taste and provide sugars to feed remaining yeasts. Fresh fruit works best because it contains natural sugars, flavor compounds, and wild yeasts that accelerate carbonation. The most effective options according to fermentation microbiology studies:
- Ginger: 1-inch piece grated per 16 oz bottle—creates aggressive carbonation and spicy-sweet flavor
- Berries: 3-5 fresh or frozen berries per bottle—high sugar content and vibrant color
- Stone fruit: 2-3 tablespoons chopped peach, plum, or apricot—subtle sweetness and floral notes
- Citrus: 2 tablespoons juice plus 1 teaspoon zest—bright acidity but slower carbonation
- Juice: 2-3 tablespoons per bottle—fastest carbonation but can dilute kombucha flavor
- Dried fruit: 1-2 tablespoons chopped—concentrated sugars for reliable carbonation
Avoid artificial sweeteners and sugar substitutes—yeasts cannot metabolize them, so they provide flavor but zero carbonation.
Related: Tepache vs Kombucha Differences Explained | WhichBrewForYou
Stevia, erythritol, and other non-caloric sweeteners will result in flat kombucha.Step 2: Fill and Seal Bottles Correctly
Proper filling technique prevents contamination and optimizes carbonation space. Use a funnel to transfer strained kombucha, leaving 1-1.5 inches of headspace at the top of each bottle. This air gap provides room for CO2 accumulation and prevents excessive pressure buildup.
- Add your chosen flavoring directly to each clean bottle first
- Pour kombucha over the flavoring using a funnel, leaving 1-1.5 inches headspace
- Seal bottles immediately with airtight caps or flip-tops
- Gently tip bottles upside down once to distribute flavorings
- Store bottles upright at room temperature away from direct sunlight
Never fill bottles to the brim. Cultures for Health fermentation safety protocols specify minimum headspace of 1 inch to accommodate gas expansion. Overfilled bottles have insufficient expansion room, dramatically increasing explosion risk.
Step 3: Ferment at the Right Temperature
Temperature controls fermentation speed and carbonation intensity. The ideal range is 68-78°F (20-26°C)—the same temperature that worked for your first fermentation. Warmer temperatures accelerate yeast activity and carbonation but can create harsh, overly yeasty flavors. Cooler temperatures slow the process but develop more refined taste profiles.
At 72°F (22°C), most kombucha achieves good carbonation in 3-4 days. Colder rooms may require 5-7 days. Warmer environments can carbonate in as little as 2 days but require vigilant monitoring to prevent over-carbonation.
Step 4: Burp Bottles to Control Pressure
Burping—briefly opening bottles to release excess CO2—is essential safety practice during second fermentation. This technique prevents dangerous pressure accumulation while letting you monitor carbonation progress.
Burping schedule for optimal safety:
- Day 1: No burping needed—CO2 production just beginning
- Day 2: Burp once in the evening—listen for gentle hiss when opening
- Day 3: Burp twice (morning and evening)—pressure building rapidly now
- Day 4+: Burp daily and taste-test—refrigerate when carbonation meets your preference
To burp safely, point the bottle away from your face and slowly release the cap. You should hear a soft hiss of escaping gas. A loud whoosh or liquid spray indicates over-carbonation—refrigerate immediately. According to Kombucha Brewers International safety standards, bottles should never build pressure beyond a gentle hiss when opened.
Step 5: Test Carbonation and Refrigerate
After 3-4 days, test carbonation by opening one bottle. The kombucha should produce a satisfying hiss and show small bubbles rising when poured into a glass. If carbonation is insufficient, reseal and ferment 1-2 more days. If carbonation meets your preference, immediately transfer all bottles to the refrigerator.
Refrigeration halts fermentation by making yeasts dormant. This locks in your achieved carbonation level and prevents over-carbonation. Refrigerated kombucha maintains carbonation and flavor for 2-3 months, though probiotics begin declining after 4 weeks according to research on fermented beverage shelf life.
What Common Problems Occur During Second Fermentation?
Even experienced brewers encounter challenges during second fermentation. Understanding causes and solutions prevents waste and safety issues.
Flat Kombucha with No Carbonation
Flat kombucha results from insufficient yeast activity or sugar. If your bottles show no carbonation after 7 days, the most likely causes are:
- First fermentation went too long: Over-fermented kombucha contains almost no residual sugar for yeasts to consume
- Too cold storage temperature: Below 65°F (18°C), yeast activity nearly stops
- Insufficient flavoring: Not enough sugar added to fuel carbonation
- Weak SCOBY: First fermentation may need fresh starter liquid or a healthier SCOBY
Solution: Add 1/2 teaspoon sugar per 16 oz bottle, reseal, and ferment 3-4 more days at room temperature. The added sugar provides yeast fuel for carbonation.
Over-Carbonated or Exploding Bottles
Excessive carbonation is dangerous. Warning signs include loud hissing, liquid spraying when opened, or bottles feeling rock-hard to gentle squeeze. Over-carbonation happens when:
- Too much sugar or fruit was added
- Fermentation temperature was too warm (above 78°F/26°C)
- Bottles weren't burped during the first 3 days
- Second fermentation lasted too long without refrigeration
If a bottle feels extremely firm or starts bulging, place it in the refrigerator immediately and open outdoors or over a sink. Never let over-carbonated bottles sit at room temperature—they can explode with enough force to cause serious injury.
Strange Flavors or Off-Putting Smells
Unpleasant flavors indicate contamination or improper fermentation conditions. Kombucha should smell pleasantly tart and fruity, never putrid or sulfurous. Off flavors develop from:
- Contaminated bottles or equipment (clean thoroughly with hot water and white vinegar)
- Moldy fruit additions (always use fresh, clean fruit)
- Plastic bottles leaching chemicals (use only glass)
- Excessive yeast overgrowth creating sulfur compounds
Trust your senses. If kombucha smells rotten, shows visible mold, or tastes unpleasantly chemical, discard it immediately. According to FDA food safety guidelines, fermented beverages showing signs of spoilage should never be consumed.
How to Achieve Professional-Level Carbonation
Commercial kombucha achieves consistent, champagne-like carbonation through controlled processes homebrewers can replicate with attention to detail.
The Fruit Juice Method for Reliable Fizz
Professional brewers often use pure fruit juice for second fermentation because it provides measured, consistent sugar content. This eliminates guesswork and produces reliable carbonation batch after batch.
Add 10-15% juice by volume to each bottle. For a 16 oz bottle, use 2-3 tablespoons of juice. High-sugar juices like grape, apple, and pineapple create the strongest carbonation. Lower-sugar options like cranberry or pomegranate produce gentler fizz but more complex flavors.
The technique used by commercial kombucha operations: combine 1 gallon finished kombucha with 1 cup fruit juice in a large pitcher, mix thoroughly, then bottle. This ensures every bottle receives identical sugar content for consistent carbonation.
Temperature Cycling for Enhanced Carbonation
Advanced brewers use temperature manipulation to accelerate carbonation. Start second fermentation at 75-78°F (24-26°C) for the first 24 hours to jumpstart yeast activity. Then reduce temperature to 68-70°F (20-21°C) for days 2-4. This cycle produces faster initial carbonation followed by slower, controlled development that prevents over-carbonation.
Adding Champagne Yeast for Maximum Fizz
For extremely carbonated kombucha, some brewers add a tiny pinch of champagne yeast (Saccharomyces bayanus) during bottling. This aggressive yeast strain tolerates high alcohol and creates vigorous carbonation. Use sparingly—1/32 teaspoon per gallon—as champagne yeast is far more active than kombucha's native yeasts.
This technique requires extreme caution and daily burping. Champagne yeast can over-carbonate bottles in 24-48 hours. Only attempt this method with pressure-rated bottles and experience managing standard second fermentation.
How Long Does Second Fermentation Take?
Second fermentation timing depends on temperature, sugar content, yeast population, and desired carbonation level. No universal timeline exists, but these ranges apply to most situations:
| Temperature | Light Carbonation | Medium Carbonation | Strong Carbonation |
|---|---|---|---|
| 65-68°F (18-20°C) | 5-7 days | 7-10 days | 10-14 days |
| 68-72°F (20-22°C) | 3-4 days | 4-6 days | 6-8 days |
| 72-78°F (22-26°C) | 2-3 days | 3-4 days | 4-6 days |
The only reliable method is daily taste testing starting on day 3. Open one "test bottle" each day, assess carbonation and flavor, then decide whether to refrigerate the batch or continue fermenting. Carbonation develops exponentially—bottles can go from under-carbonated to over-carbonated in 24 hours during the final stages.
People Also Ask
Can you do second fermentation without adding anything?
Yes, but carbonation will be minimal. Plain second fermentation relies solely on residual sugars from first fermentation, producing light fizz. Most brewers prefer adding fruit or juice to guarantee carbonation and develop interesting flavor profiles.
Do you need to burp kombucha every day?
Burping daily during days 2-4 prevents dangerous over-carbonation. After day 4, burp every 1-2 days if fermentation continues. Once refrigerated, burping is unnecessary as cold temperatures halt CO2 production.
Can second fermentation happen in the fridge?
Second fermentation requires room temperature for active yeast metabolism. Refrigeration slows fermentation to nearly zero, preventing carbonation development. Always complete second fermentation at room temperature, then refrigerate to halt the process.
Expert Verdict
Second fermentation is the defining step that transforms homebrewed kombucha from amateur experiment to professional-quality beverage. The process demands attention to bottle safety, temperature control, and daily monitoring, but the reward is consistent, delicious carbonation. Master the fundamentals—proper bottles, controlled temperature, measured additions, and timely refrigeration—before attempting advanced techniques. Start with simple fruit additions like berries or ginger, burp religiously during the first three days, and refrigerate the moment you achieve your desired carbonation level. With these practices, you'll produce kombucha that rivals any commercial brand.
Summary
- Second fermentation creates carbonation by trapping CO2 in sealed bottles over 2-7 days at room temperature
- Use only pressure-rated glass bottles like flip-top or swing-top designs to prevent dangerous explosions
- Add fruit, juice, or sugar to provide yeast fuel—10-15% juice by volume produces reliable carbonation
- Burp bottles daily during days 2-4 to release excess pressure and prevent over-carbonation
- Ferment at 68-78°F (20-26°C) for optimal yeast activity and flavor development
- Test carbonation daily starting day 3 and refrigerate immediately when desired fizz level is reached
- Refrigeration halts fermentation and preserves carbonation for 2-3 months
Frequently Asked Questions
What bottles are safe for kombucha second fermentation?
Flip-top glass bottles and swing-top bottles designed for carbonated beverages are safest, rated for 80+ PSI. Recycled GT's kombucha bottles work well. Avoid mason jars, wine bottles with corks, and any thin glass—these can shatter from pressure buildup.
How much fruit should I add per bottle?
Add 3-5 fresh berries, 1 inch grated ginger, or 2-3 tablespoons chopped fruit per 16 oz bottle. Alternatively, use 2-3 tablespoons fruit juice. Too much fruit creates excessive carbonation and explosion risk; too little results in flat kombucha.
Can I skip second fermentation?
Yes, you can drink kombucha straight from first fermentation. It will be flat or lightly fizzy with straightforward tartness. Second fermentation is optional but creates the carbonation and complex flavors characteristic of commercial kombucha.
Why is my second fermentation not carbonating?
Common causes include over-fermented first batch with no residual sugar, too-cold storage temperature, insufficient fruit additions, or weak yeast population. Add 1/2 teaspoon sugar per bottle, ensure room temperature storage, and ferment 3-4 additional days.
How do I know when second fermentation is done?
Open a test bottle after 3-4 days. Properly carbonated kombucha produces a gentle hiss, shows rising bubbles when poured, and tastes pleasantly fizzy. If under-carbonated, reseal and check daily. Refrigerate immediately when carbonation meets your preference.
Can kombucha explode during second fermentation?
Yes, excessive carbonation can cause bottles to explode if pressure isn't controlled. Burp bottles daily during the first 3 days, never use mason jars or thin glass, and refrigerate immediately if bottles feel rock-hard or make loud hissing sounds when opened.
More Kombucha Articles
This article was produced by an automated research tool. Content is for informational purposes only and should not replace professional advice. Nothing here is medical advice, and it is not a substitute for it. Talk to a doctor about anything affecting your health. Product and resource links throughout this article are included for informational value based on relevance and quality. WhichBrewForYou has no affiliate relationship with any linked third-party site and receives no commission from any recommended products or brands. BellofattoBrews (coffee and tea) and Golden Hive Mead (mead kits and resources) are personal recommendations from this publication's founder and have no affiliation with WhichBrewForYou.