Key Takeaways
- Mead requires only three essential ingredients: honey, water, and yeast—no cooking or boiling needed.
- A standard 1-gallon beginner batch uses approximately 3 pounds of honey and costs $15-25 in ingredients.
- Primary fermentation completes in 2-6 weeks at room temperature (65-75°F), followed by optional aging for flavor development.
- Sanitization is the single most critical step—unsanitized equipment causes 80% of beginner batch failures according to the American Homebrewers Association.
- Traditional mead contains 10-14% ABV, roughly equivalent to wine, with sweetness ranging from bone-dry to dessert-style depending on honey quantity.
What Equipment Do You Need to Make Mead at Home?
The equipment requirements for homebrewing mead are minimal compared to beer or wine. Every beginner needs five essential items: a food-grade fermentation vessel, an airlock and stopper, a sanitizer, a long-handled spoon, and a way to bottle the finished mead. According to the American Homebrewers Association, most first-time mead makers invest $30-60 in starter equipment that lasts for dozens of batches.
Essential Equipment for Your First Batch
A 1-gallon glass carboy or food-grade plastic fermentation bucket serves as your primary vessel. Glass offers visibility to monitor fermentation activity, while plastic is lighter and less breakable. Both work equally well for beginners. The vessel must be larger than your batch volume—a 1-gallon carboy holds approximately 0.75-0.8 gallons of must to allow headspace for fermentation foam.
An airlock (also called a fermentation lock) is a one-way valve filled with water or sanitizer that allows carbon dioxide to escape while preventing oxygen and contaminants from entering. The Golden Hive Mead brewing guide emphasizes that airlocks prevent oxidation, which causes off-flavors and spoilage in finished mead.
Star San or Iodophor sanitizer eliminates bacteria and wild yeasts that compete with your chosen yeast strain. A study published in NCBI found that proper sanitization reduces contamination rates by 95% in home fermentation. Mix sanitizer according to package directions and contact every surface for the recommended time—typically 30-60 seconds.
| Equipment Item | Purpose | Approximate Cost |
|---|---|---|
| 1-Gallon Glass Carboy | Primary fermentation vessel | $15-20 |
| Airlock & Stopper | Gas release and contamination barrier | $3-5 |
| Star San Sanitizer | Equipment sanitization | $8-12 |
| Long-Handled Spoon | Stirring and aeration | $5-8 |
| Siphon or Auto-Siphon | Transferring and bottling | $10-15 |
| Bottles & Caps/Corks | Storage of finished mead | $8-15 |
Optional But Helpful Tools
A hydrometer measures specific gravity—the density of your must relative to water—which allows you to calculate alcohol content and track fermentation progress. Original gravity (OG) readings before fermentation and final gravity (FG) readings after fermentation complete provide precise ABV calculations. Most hydrometers cost $8-12 and include a test jar.
A funnel simplifies transferring honey and water into narrow-necked carboys without spills. Northern Brewer educational resources recommend using a funnel with a built-in strainer to catch any wax particles or debris from raw honey.
Temperature strips that adhere to fermentation vessels help monitor ambient temperature, which directly affects yeast activity and flavor development. Most ale yeasts perform optimally between 65-75°F, while cooler temperatures produce cleaner, crisper mead profiles.
Which Ingredients Create the Best Beginner Mead?
Mead's ingredient list is deceptively simple, but quality matters significantly. The three mandatory ingredients—honey, water, and yeast—determine every aspect of your mead's flavor, aroma, alcohol content, and clarity. According to the American Mead Makers Association, ingredient selection accounts for 70% of final mead quality, while technique accounts for the remaining 30%.
Choosing the Right Honey
Honey is simultaneously the sugar source for fermentation and the primary flavor component. Wildflower honey from local apiaries offers balanced sweetness with mild floral notes—ideal for first-time brewers. Orange blossom honey produces citrus-forward mead, while buckwheat honey creates dark, malty, earthy flavors that some find overpowering.
A standard 1-gallon batch requires 2.5-3.5 pounds of honey depending on desired sweetness and alcohol level. A 3-pound batch typically yields 10-12% ABV semi-sweet mead. Research from ScienceDirect shows that honey's dissolved sugar concentration directly correlates with potential alcohol—higher honey ratios produce sweeter, stronger mead.
Avoid ultra-filtered or heated honey sold in squeeze bottles at grocery stores. Heat processing destroys the delicate aromatics and enzymes that contribute complexity to finished mead. Raw, unfiltered honey from farmers markets or specialty mead suppliers preserves these compounds.
Water Quality and Treatment
Water comprises 75-85% of finished mead by volume, making it the second most important ingredient. Municipal tap water treated with chlorine or chloramine creates medicinal off-flavors described as "band-aid" or "plastic." Carbon-filtered water removes these compounds, or you can use spring water purchased in gallon jugs.
Distilled water lacks the minerals yeast requires for healthy fermentation. If using distilled water, add yeast nutrient (discussed below) to provide essential minerals. Well water should be tested for bacterial contamination—boil for 10 minutes before use if unsure of quality.
Yeast Selection for Beginners
Yeast strains designed specifically for mead fermentation produce the cleanest results for beginners. Lalvin D-47 and Lalvin 71B-1122 are workhorses in the mead community—both tolerate alcohol levels up to 14%, ferment cleanly at room temperature, and enhance honey aromatics rather than masking them.
Beer yeasts like Safale US-05 or English ale yeast work in a pinch but produce more estery, fruity notes that compete with honey character. Wine yeasts such as EC-1118 ferment vigorously and tolerate high alcohol, but they strip delicate honey flavors—save these for advanced recipes.
A single 5-gram packet of dry yeast costs $1-2 and ferments 1-5 gallons of mead. No rehydration is necessary for most dry yeasts, though Got Mead forums report that 15-minute rehydration in 95°F water improves cell viability and shortens lag time.
Yeast Nutrients and Energizers
Honey is nutrient-poor compared to grape must or malted grains. Yeast requires nitrogen, minerals, and vitamins for healthy fermentation. Without supplementation, fermentation stalls midway (leaving sweet, low-alcohol mead) or produces hydrogen sulfide (rotten egg smell).
Fermaid-O and Fermaid-K are balanced yeast nutrient blends containing diammonium phosphate (DAP), amino acids, and micronutrients. Add 1 gram per gallon at the start of fermentation and another 1 gram at the 1/3 sugar break (when 1/3 of sugars have fermented). According to research published in NCBI, staggered nutrient additions reduce fermentation time by 30-40% and improve yeast health markers.
Related: How to Make Cold Brew Coffee at Home — Simple Guide
Step-by-Step Process: How to Brew Your First Batch of Mead
The actual brewing process is more forgiving than most beginners expect. Mead-making follows five distinct phases: sanitization, must preparation, fermentation, clarification, and bottling. Unlike beer brewing, no boiling occurs—you're simply creating a honey-water solution, adding yeast, and waiting.
Step 1: Sanitize Everything
Mix sanitizer according to package directions in a large bucket or basin. Submerge your fermentation vessel, airlock, stopper, funnel, spoon, and any other equipment that contacts the must. Star San requires 30 seconds of contact time and is no-rinse—excess sanitizer drains away and doesn't affect yeast.
Sanitize your hands as well, especially if you'll be handling equipment during must preparation. Unsanitized equipment introduces lactobacillus, acetobacter, or wild yeasts that create sour, vinegary, or funky off-flavors. The Beer Judge Certification Program identifies contamination as the leading cause of undrinkable homebrew across all categories.
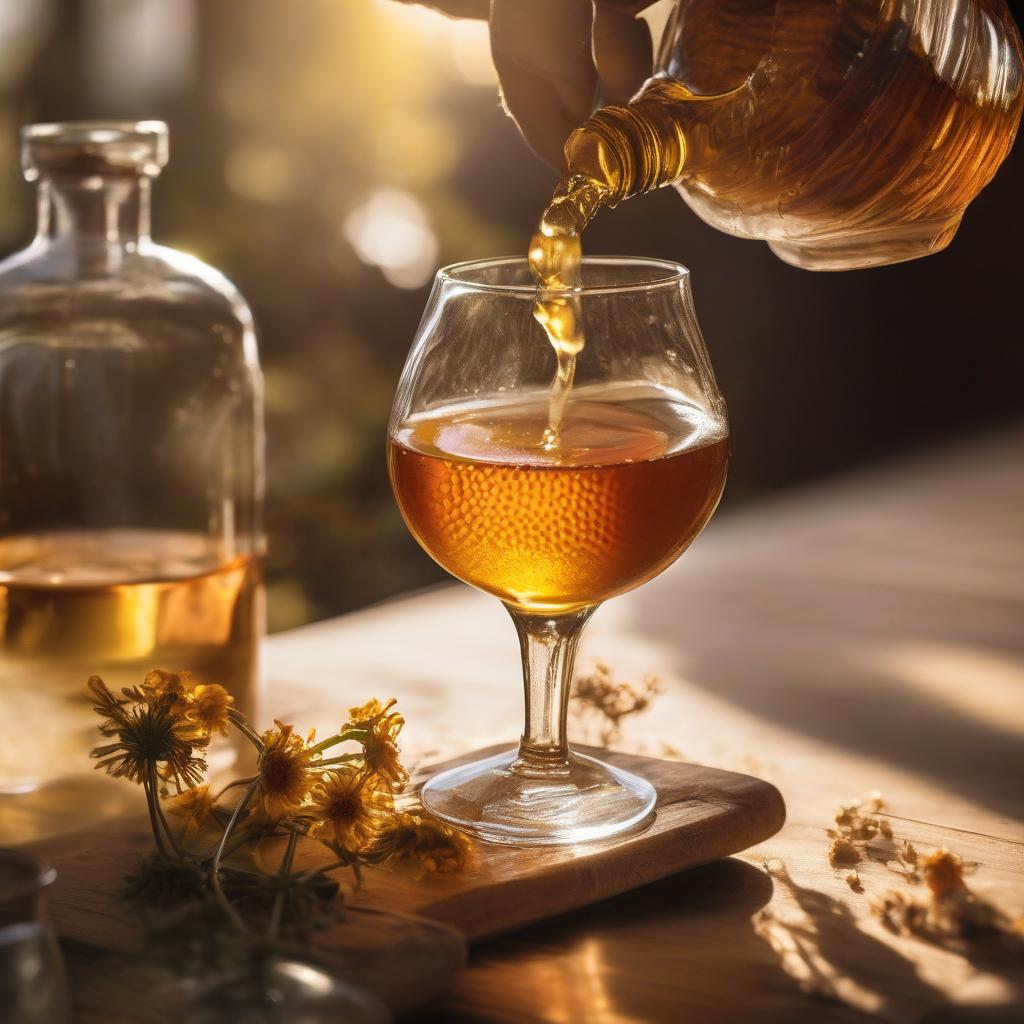
Step 2: Create Your Honey Must
Pour 0.5 gallons (64 ounces) of room-temperature water into your sanitized fermentation vessel. Add 3 pounds of honey. This creates a 1-gallon batch with approximately 1.120 specific gravity—enough sugar to produce 12-14% ABV if fermented dry, or 10-12% ABV with residual sweetness.
Stir vigorously for 2-3 minutes with your sanitized spoon until honey fully dissolves. Honey sinks to the bottom and resists mixing—persistent stirring is necessary. Add additional water to bring total volume to 1 gallon, leaving 2-3 inches of headspace at the top of the vessel.
This is called a "must" in meadmaking terminology, equivalent to "wort" in beer brewing or "must" in winemaking. The honey-water mixture is now ready for yeast.
Step 3: Add Yeast and Nutrients
Sprinkle one 5-gram packet of Lalvin D-47 or 71B-1122 yeast directly onto the must surface. No rehydration is required for most modern dry yeasts, though rehydration improves performance (see above). Alternatively, rehydrate yeast in 1/4 cup of 95°F water for 15 minutes before adding.
Add 1 gram of yeast nutrient (approximately 1/4 teaspoon). Stir gently to distribute yeast throughout the must. According to Meadist's style guides, oxygenating the must at this stage—shaking the sealed vessel vigorously for 60 seconds—provides dissolved oxygen that yeast cells need for reproduction.
Insert the stopper and airlock into the vessel opening. Fill the airlock halfway with water or sanitizer. The water barrier allows CO2 to bubble out while preventing airborne contaminants from entering.
Step 4: Primary Fermentation
Place your sealed fermentation vessel in a dark location with stable temperature between 65-75°F. Avoid direct sunlight, which degrades honey aromatics and can create off-flavors. Closets, basements, or interior rooms work well.
Fermentation begins within 12-48 hours—you'll see bubbles rising through the must and passing through the airlock. Vigorous fermentation produces 20-40 bubbles per minute during peak activity (days 2-7). Activity gradually slows over 2-6 weeks as yeast consumes available sugars.
Aerate the must daily for the first 5-7 days by removing the stopper and stirring vigorously for 30 seconds, or by shaking the sealed vessel. This provides oxygen for yeast reproduction. After day 7, seal the vessel and don't open it—oxygen exposure at this stage causes oxidation and spoilage.
Add a second 1-gram dose of yeast nutrient at the 1/3 sugar break (usually day 3-5). You can estimate this point by watching airlock activity—when bubbling slows from rapid to moderate, you've reached roughly 1/3 fermentation completion.
Step 5: Monitor Fermentation Completion
Fermentation is complete when airlock activity stops completely—no bubbles for 48 consecutive hours. This typically occurs at 3-6 weeks for standard-strength mead. A hydrometer reading confirms completion: gravity should stabilize at the same number for 3 consecutive days.
Expected final gravity ranges from 0.990-1.020 depending on yeast strain and honey quantity. Below 1.000 produces bone-dry mead. 1.010-1.020 leaves pleasant residual sweetness. Above 1.020 indicates stalled fermentation—yeast stopped working before consuming all sugars.
Step 6: Clarification and Conditioning
After primary fermentation completes, mead is technically drinkable but often cloudy and harsh. Transfer (rack) the mead off the yeast sediment into a clean, sanitized vessel using a siphon. Leave dead yeast cells and sediment behind—these cause off-flavors if left in contact too long.
Let mead sit undisturbed for 2-4 weeks to clarify. Suspended yeast cells, proteins, and wax particles gradually settle out, leaving crystal-clear mead. Cool temperatures (50-60°F) speed clarification. Alternatively, add 1/4 teaspoon of bentonite clay or Sparkolloid fining agent to drop particles quickly.
Aging improves mead significantly. Young mead (under 2 months old) often tastes hot, alcoholic, or one-dimensional. Six months of aging at cool room temperature allows harsh edges to smooth out and honey complexity to emerge. Patience is the mead maker's greatest tool.
Step 7: Bottling Your Finished Mead
Once mead is clear and tastes balanced, it's ready to bottle. Use a siphon to transfer mead into sanitized wine bottles or swing-top bottles. Fill to within 1 inch of the top. Cork wine bottles with new corks (never reuse corks—they don't reseal), or use caps for beer bottles.
Store bottled mead upright in a cool, dark location. Properly made mead remains stable for years—no refrigeration required. The Harvard Nutrition Source notes that alcohol content above 10% provides natural preservation against bacterial growth.
Label bottles with the batch date and honey variety. Mead continues to mature in the bottle. Most meads peak at 6-18 months but remain drinkable for a decade or longer.
Related: Best Tea for Relaxation and Stress Relief | WhichBrewForYou
What Are the Most Common Beginner Mistakes?
First-time mead makers encounter predictable pitfalls. The most frequent errors involve sanitization shortcuts, incorrect honey-water ratios, temperature fluctuations, and impatience during fermentation and aging. Understanding these mistakes before brewing prevents disappointment and wasted ingredients.
Insufficient Sanitization
Skipping sanitization or cutting contact time short allows contaminating organisms to multiply during fermentation. Bacterial infections create ropy, slimy texture or acetic acid (vinegar) flavors. Wild yeast produces barnyard, funky, or phenolic medicinal notes. Once contamination establishes, the batch is unrecoverable.
Solution: Sanitize every piece of equipment that touches must or mead. Use fresh sanitizer mixed at the proper concentration. Contact time matters—don't rush it.
Using Too Little Honey
Mead requires more honey than beginners expect. A 1-gallon batch with only 1-2 pounds of honey produces thin, watery, low-alcohol beverage that barely resembles mead. The Got Mead community reports that underpitched honey is the second most common beginner error after sanitization failures.
Solution: Use minimum 2.5 pounds of honey per gallon for dry mead, 3-3.5 pounds for semi-sweet, and 4+ pounds for sweet dessert mead. More honey equals more body, more flavor, and more alcohol potential.
Skipping Yeast Nutrients
Honey lacks the nitrogen compounds and minerals that yeast requires for healthy fermentation. Nutrient-starved yeast produces hydrogen sulfide (rotten egg smell), fusels (harsh alcohol burn), or stalls mid-fermentation. According to research from ScienceDirect, nutrient supplementation reduces fermentation defects by 60-80% in honey-based fermentations.
Solution: Add yeast nutrient at the start of fermentation and again at the 1/3 sugar break. Use Fermaid-K, Fermaid-O, or a similar balanced nutrient blend formulated for mead.
Temperature Extremes
Fermentation temperatures above 80°F produce harsh, solvent-like fusel alcohols and can stress or kill yeast. Temperatures below 60°F cause yeast to go dormant—fermentation slows or stops completely.
Solution: Maintain 65-75°F during active fermentation. Use a temperature-controlled fermentation chamber, wrap the vessel in a blanket during cold weather, or choose a naturally stable location like an interior closet.
Opening the Fermenter Frequently
Oxygen is yeast's friend during the first week but mead's enemy after that. Repeated opening of the fermenter after day 7 introduces oxygen that causes oxidation—flat, cardboard, or sherry-like flavors in finished mead.
Solution: Aerate daily during the first 5-7 days only. After yeast reproduction completes, seal the vessel and leave it alone until fermentation finishes.
Bottling Too Early
Bottling before fermentation completely finishes traps residual CO2, creating bottle bombs that explode or gush when opened. Residual yeast can restart fermentation in the bottle, producing excess carbonation and potentially bursting glass.
Solution: Confirm fermentation completion with 48 hours of zero airlock activity and stable gravity readings before bottling. When in doubt, wait another week.
How Long Does Homemade Mead Take From Start to Finish?
Timeline is the most common question from prospective mead makers. Primary fermentation takes 2-6 weeks, clarification requires 2-4 weeks, and optimal aging lasts 3-6 months—total time from brewing to peak drinkability ranges from 3-9 months. However, mead is technically safe to drink as soon as fermentation completes, though flavor improves dramatically with age.
Fermentation Phase Timeline
Active fermentation begins 12-48 hours after yeast addition. Peak activity occurs during days 2-7, when vigorous bubbling produces 20-60 bubbles per minute through the airlock. Fermentation slows during week 2, with bubbling decreasing to 5-10 per minute. By week 3-4, activity drops to occasional bubbles or stops entirely.
Lower-gravity meads (2.5 pounds honey per gallon) finish faster—often within 2-3 weeks. Higher-gravity meads (3.5-4 pounds per gallon) require 4-6 weeks as yeast struggles with increasing alcohol levels and sugar concentration.
Clarification and Conditioning
After racking off yeast sediment, mead requires 2-4 weeks to drop clear. Proteins, wax particles, and suspended yeast cells settle slowly under gravity. Cold temperatures accelerate this process—mead clarifies twice as fast at 55°F compared to 70°F.
Fining agents like bentonite or Sparkolloid force clarification in 3-7 days but aren't necessary for beginners. Patience produces the same result without additives.
Aging and Maturation
Young mead (under 8 weeks old) tastes hot, one-dimensional, and harsh. Alcohol burn dominates the palate, and honey character seems flat or nonexistent. According to Meadist's tasting guides, chemical reactions during aging—esterification, oxidation of acetaldehyde, and polymerization of tannins—create complexity and balance.
Minimum recommended aging is 3 months for dry meads and 6 months for semi-sweet or sweet styles. Many traditional meads peak at 12-18 months. Unlike beer, which degrades with age, mead improves for years under proper storage conditions.
Can you drink mead younger? Absolutely. Mead is safe to consume as soon as fermentation completes and you've confirmed stability. Younger mead simply tastes less refined—perfectly fine for casual drinking but not competition-quality.
People Also Ask
Can You Make Mead Without Adding Yeast?
Wild yeast naturally present on honey and in the air can ferment mead without commercial yeast addition, but results are unpredictable. Fermentation may take 8-12 weeks, and flavors range from excellent to undrinkable. Commercial yeast ensures consistent, reliable results for beginners.
Does Homemade Mead Need to Be Refrigerated?
Finished mead with 10%+ ABV requires no refrigeration due to alcohol's preservative properties. Store bottled mead upright in a cool, dark location. Refrigeration isn't harmful but isn't necessary unless mead is lower-alcohol (under 8% ABV) or back-sweetened with residual sugars post-fermentation.
Why Is My Mead Cloudy After Months?
Persistent cloudiness indicates suspended yeast, pectin haze from fruit additions, or bacterial contamination. Cold-crash the mead at 35-40°F for 5 days to force particles to settle, or use bentonite fining agent. If cloudiness appears suddenly after months of clarity, test for infection before consuming.
Expert Verdict: Start Simple and Scale Up
The best first batch is a traditional mead (honey, water, yeast, nutrients) with no fruit, spices, or experimental additions. Master the fundamentals before adding complexity. Use 3 pounds of local wildflower honey, Lalvin 71B-1122 yeast, and staggered nutrient additions. Ferment at 68-72°F for 4 weeks, rack to secondary, and age for 6 months. This formula produces reliably excellent mead that showcases honey character without distractions. Once you've succeeded with a traditional batch, explore melomel (fruit mead), metheglin (spiced mead), or cyser (apple mead) variations. Every accomplished mead maker started with a simple 1-gallon batch—there's no substitute for hands-on experience.
Article Summary
- Mead requires only honey, water, yeast, and nutrients—no cooking or specialized equipment beyond basic fermentation supplies costing $30-60.
- A standard 1-gallon beginner batch uses 3 pounds of raw honey, 1 gallon of water, 5 grams of dry yeast, and 2 grams of yeast nutrient for 10-14% ABV mead.
- Fermentation completes in 2-6 weeks at 65-75°F, with daily aeration during the first week and hands-off monitoring afterward—airlock activity indicates progress.
- Sanitization prevents 80% of beginner failures—contact all equipment with proper sanitizer for recommended time before each use.
- Aging dramatically improves flavor—minimum 3 months for dry styles, 6 months for semi-sweet—though mead is safe to drink immediately after fermentation completes and clarifies.
Frequently Asked Questions
Is Making Mead at Home Legal?
Federal law permits adults 21+ to brew up to 100 gallons of mead per person annually (200 gallons per household with two+ adults) for personal consumption. State laws vary—most allow home meadmaking without permits, but check local regulations. Selling homemade mead requires federal and state licenses.
How Much Does It Cost to Make a Gallon of Mead?
Ingredients for 1 gallon cost $15-25: $12-18 for 3 pounds of honey, $1-2 for yeast, $1-2 for nutrients, and $1-3 for water if purchasing spring water. Equipment costs $30-60 for initial setup but lasts for dozens of batches, reducing per-batch cost below $1 for reusable items.
Can You Make Mead With Table Sugar Instead of Honey?
Fermented sugar-water is technically wine or sugar wash, not mead. By definition, mead must contain honey as the majority fermentable. You can reduce honey costs by using 50-70% honey with 30-50% table sugar, creating a honey wine hybrid, but pure sugar produces flavorless alcohol without honey's aromatics and body.
What Does Homemade Mead Taste Like?
Traditional mead tastes similar to white wine with pronounced honey sweetness and floral notes. Flavor depends heavily on honey variety—orange blossom creates citrus notes, clover produces mild sweetness, and buckwheat yields earthy, malty character. Dry meads resemble Chardonnay, while sweet meads compare to dessert wines or liqueurs.
Why Did My Mead Stop Fermenting Early?
Stalled fermentation results from nutrient deficiency, temperature extremes, insufficient yeast pitch, or yeast reaching its alcohol tolerance limit. Restart fermentation by warming to 70°F, adding fresh nutrients, and gently rousing yeast sediment. If gravity remains above 1.020 despite these steps, consider repitching fresh yeast.
Can You Carbonate Homemade Mead?
Yes—bottle conditioning produces natural carbonation by adding priming sugar before bottling, allowing residual yeast to carbonate mead in sealed bottles over 2-3 weeks. Use 0.5-1 ounce of corn sugar per gallon for light carbonation. Forced carbonation with a kegging system offers precise control and faster results.
More Mead Articles
This article was produced by an automated research tool. Content is for informational purposes only and should not replace professional advice. Product and resource links throughout this article are included for informational value based on relevance and quality. WhichBrewForYou has no affiliate relationship with any linked third-party site and receives no commission from any recommended products or brands. BellofattoBrews (coffee and tea) and Golden Hive Mead (mead kits and resources) are personal recommendations from this publication's founder and have no affiliation with WhichBrewForYou.