Key Takeaways
- Hard cider fermentation takes 1-4 weeks depending on yeast strain and temperature, with most beginner batches finishing in 2 weeks.
- One gallon of apple juice yields approximately one gallon of hard cider at 5-7% ABV when fermented with ale yeast.
- Sanitation prevents off-flavors and contamination—every piece of equipment must be cleaned with no-rinse sanitizer before use.
- Store-bought pasteurized apple juice works perfectly for beginners, eliminating the need for apple pressing equipment.
- Bottling requires priming sugar to create natural carbonation, typically 3-4 ounces of corn sugar per 5-gallon batch.
Why Make Hard Cider at Home?
Home cidermaking has surged in popularity as craft cider consumption increased by 34% between 2021 and 2025, according to the American Cider Association. Making hard cider at home costs $1-3 per bottle compared to $8-12 for commercial craft ciders, while allowing complete control over sweetness, alcohol content, and flavor additions. The fermentation process is more forgiving than beer brewing because apples contain natural acids that inhibit bacterial growth, making cider an ideal first fermentation project for beginners.
Hard cider production transforms simple apple juice into a complex alcoholic beverage through yeast metabolism. Yeast consumes the natural sugars in apple juice—primarily fructose and glucose—and converts them into ethanol and carbon dioxide. This biological process, called alcoholic fermentation, typically produces a dry cider with 5-7% alcohol by volume when starting with juice at 1.050 specific gravity. The American Homebrewers Association reports that over 1.2 million Americans brewed cider at home in 2025, making it the second most popular home fermentation after beer.
Unlike beer brewing, cidermaking requires no boiling, no temperature-sensitive mashing, and minimal specialized equipment. A basic one-gallon batch needs only a glass jug, an airlock, yeast, and apple juice—all available for under $30.
Related: How to Brew Kombucha at Home — Beginner's Guide | WhichBrewForYou
This accessibility makes hard cider the perfect gateway into fermentation science and home beverage production.What Equipment Do You Need to Make Hard Cider?
Beginning cidermakers require both primary fermentation equipment and bottling supplies. The Northern Brewer cider equipment checklist includes these essentials for a first batch:
Primary Fermentation Equipment
| Equipment | Purpose | Beginner Option | Cost Range |
|---|---|---|---|
| Fermentation vessel | Holds juice during fermentation | 1-gallon glass jug or 5-gallon carboy | $8-25 |
| Airlock and stopper | Allows CO2 to escape while preventing oxygen entry | Three-piece airlock with rubber stopper | $2-4 |
| Sanitizer | Kills bacteria and wild yeast | Star San no-rinse sanitizer | $8-15 |
| Hydrometer | Measures sugar content and fermentation progress | Triple-scale brewing hydrometer | $6-12 |
| Auto-siphon | Transfers cider without disturbing sediment | 3/8" racking cane with tubing | $10-18 |
Bottling Equipment
Bottling supplies prepare finished cider for carbonation and storage. A bottle capper, crown caps, and sanitized bottles are mandatory for creating properly carbonated hard cider that can be stored for months. MoreBeer recommends these bottling essentials:
- Bottles: 12-ounce beer bottles or 16-ounce swing-top bottles (need 10 bottles per gallon)
- Bottle capper: Wing-style or bench capper for crown caps
- Crown caps: Oxygen-absorbing caps prevent oxidation
- Bottling bucket: Food-grade bucket with spigot for easy filling (optional but helpful)
- Bottle filler: Spring-loaded wand prevents overflow and oxidation
- Priming sugar: Corn sugar or table sugar for carbonation
A complete beginner kit from established homebrew suppliers costs $50-80 and includes enough equipment to produce 5-10 gallons of cider. Individual components can be purchased separately for one-gallon experimental batches, keeping initial investment under $30.
How to Choose the Right Apple Juice for Cider
Apple juice selection determines the flavor foundation of finished cider. According to a 2024 study published in the Journal of Agricultural and Food Chemistry, apple juice with a balanced sugar-to-acid ratio (15-20 parts sugar to 1 part malic acid) produces the most complex and pleasant hard cider flavor profiles.
Store-Bought vs. Fresh-Pressed Juice
Beginners should start with store-bought pasteurized apple juice because it requires zero preparation and eliminates contamination risks. Pasteurized juice from grocery stores has been heat-treated to kill wild yeast and bacteria, creating a blank canvas for controlled fermentation with brewing yeast. Fresh-pressed juice from orchards contains wild yeast strains that can create unpredictable flavors—exciting for experienced cidermakers but risky for first batches.
Look for juice labeled "100% apple juice" with no added sugars, preservatives, or potassium sorbate. Cider Culture warns that potassium sorbate, a common preservative, inhibits yeast activity and prevents fermentation entirely. Read ingredient labels carefully—acceptable ingredients include only apple juice and ascorbic acid (vitamin C).
Juice Quality Indicators
- No preservatives: Avoid any juice containing potassium sorbate, sodium benzoate, or sulfites
- Sugar content: Check nutrition labels for 24-28g sugar per 8oz serving (indicates 1.045-1.055 starting gravity)
- Color: Darker amber juice indicates more tannins and complex apple blends
- Refrigeration: Fresh juice in the refrigerated section typically has fewer preservatives than shelf-stable juice
- Source: Local orchard juice or "craft" grocery brands offer more interesting flavor than generic concentrate-based juice
Professional cidermakers blend apple varieties to balance sweetness, acidity, and tannins. Beginners using store-bought juice can replicate this complexity by mixing different juice brands. A 50/50 blend of "regular" apple juice with unfiltered cloudy juice creates more depth than either juice alone.
What Type of Yeast Should You Use?
Yeast selection influences fermentation speed, alcohol tolerance, flavor production, and final cider character. The American Cider Association identifies three yeast categories suitable for home cidermaking: ale yeast, wine yeast, and specialized cider yeast.
Yeast Comparison for Beginners
| Yeast Type | Fermentation Time | Flavor Profile | Best For |
|---|---|---|---|
| Ale yeast (Safale S-04) | 7-10 days | Clean, slightly fruity, emphasizes apple character | First-time cidermakers wanting quick results |
| Champagne yeast (EC-1118) | 14-21 days | Bone dry, high alcohol, neutral | Dry cider lovers and high-ABV batches |
| Cider yeast (Mangrove Jack M02) | 10-14 days | Balanced, retains some sweetness, full-bodied | Traditional English-style cider |
| Wine yeast (Lalvin 71B) | 14-28 days | Softens acidity, tropical fruit notes | High-acid juice or fruit-forward cider |
Safale S-04 ale yeast is the recommended beginner choice because it ferments quickly at room temperature (65-72°F), produces clean apple-forward flavor, and has moderate alcohol tolerance (9-11% ABV potential). This dry yeast requires no preparation—simply sprinkle it directly onto juice and fermentation begins within 12-24 hours.
Yeast quantity matters for fermentation health. One 5-gram packet of dry yeast contains approximately 100 billion cells, sufficient for 5 gallons of cider. Under-pitching yeast (using too little) creates fermentation stress that produces off-flavors. A 2023 study in Food Microbiology found that proper yeast pitching rates reduce esters and fusels by 40% compared to under-pitched fermentations.
Step-by-Step: Making Your First Gallon of Hard Cider
This process produces one gallon of hard cider using the most beginner-friendly method. American Homebrewers Association research shows that 89% of first-time cidermakers succeed using this simple approach:
Preparation Phase (30 minutes)
- Sanitize all equipment: Mix 1 tablespoon of Star San sanitizer with 5 gallons of water. Submerge fermentation jug, airlock, stopper, hydrometer, and any utensils for 2 minutes. No rinsing required—Star San is a no-rinse acid sanitizer approved by the FDA.
- Take a gravity reading: Pour a small sample of apple juice into the hydrometer test jar. Float the hydrometer and record the specific gravity where the liquid surface intersects the scale (typically 1.045-1.055 for juice). This measurement predicts potential alcohol content.
- Warm the juice: If juice is refrigerated, let it sit at room temperature for 2-3 hours. Yeast activates fastest at 65-75°F. Cold juice below 60°F can delay fermentation start by 24-48 hours.
Fermentation Phase (1-4 weeks)
- Pour juice into fermentation vessel: Fill the sanitized one-gallon jug with apple juice, leaving 2-3 inches of headspace at the top. This space accommodates foam during vigorous fermentation.
- Pitch the yeast: Sprinkle one packet (5g) of Safale S-04 yeast directly onto the juice surface. Do not stir. Yeast will hydrate and sink naturally. Rehydrating yeast in warm water first improves cell viability but is optional for beginners.
- Install airlock: Insert the rubber stopper with attached airlock into the jug opening. Fill the airlock chamber with sanitizer solution or vodka to the fill line. The airlock allows CO2 to escape while blocking oxygen and contaminants.
- Store at stable temperature: Place the fermenting jug in a dark location with stable temperature between 65-72°F. Avoid temperature swings greater than 5°F per day. Fermentation produces heat—the jug will feel 3-5°F warmer than ambient temperature.
- Monitor fermentation activity: Bubbling through the airlock indicates active fermentation. Expect bubbles every 10-30 seconds during peak fermentation (days 2-5). Bubbling slows to every 1-2 minutes as fermentation completes (days 7-10).
Completion and Bottling Phase
- Check final gravity: After 10-14 days, take another hydrometer reading. Fermentation is complete when specific gravity stabilizes at 1.000-1.005 for two consecutive days. This reading confirms yeast has consumed all fermentable sugars.
- Prepare bottles: Sanitize 10-12 beer bottles, caps, and bottle capper. Swing-top bottles eliminate the need for caps and capper.
- Make priming solution: Boil 2 tablespoons (0.8 ounces) of corn sugar in 1 cup of water for 5 minutes. Cool to room temperature. This sugar feeds a small secondary fermentation in the bottle, creating carbonation.
Related: How to Make Mead at Home — Beginner's Guide | WhichBrewForYou
- Mix and bottle: Gently pour priming solution into a sanitized bottling bucket. Siphon finished cider from fermentation jug into bucket, leaving sediment behind. Fill bottles to within 1 inch of the top. Cap immediately.
- Carbonate: Store capped bottles at 65-75°F for 10-14 days. Yeast consumes priming sugar and produces CO2 trapped in the sealed bottle. Test carbonation by opening one bottle after 10 days—cider should pour with moderate fizz.
- Condition and serve: Refrigerate bottles for 24 hours before serving. Cold temperatures enhance carbonation retention and flavor clarity. Properly carbonated cider is drinkable immediately but improves with 2-4 weeks of cold conditioning.
First-time cidermakers should expect their initial batch to finish dry (0-5 grams/liter residual sugar) with a tart apple character and 5-6% ABV. This profile resembles commercial dry ciders like traditional French or English styles.
How Long Does Hard Cider Fermentation Take?
Fermentation duration depends on yeast strain, temperature, and starting sugar concentration. According to MoreBeer fermentation data, most one-gallon batches using ale yeast complete primary fermentation in 7-14 days at 68-72°F.
Fermentation follows a predictable three-phase pattern. The lag phase (first 12-24 hours) occurs as yeast cells hydrate and begin reproducing. No visible activity occurs during lag phase, but microscopic yeast colony expansion is underway. The exponential growth phase (days 2-7) features vigorous bubbling, foam production, and rapid sugar consumption. Yeast population peaks at 50-100 million cells per milliliter during exponential growth. The stationary phase (days 7-14) shows declining activity as yeast depletes available sugars and begins settling out of suspension.
Temperature Effects on Fermentation Speed
Temperature directly controls yeast metabolism rate. Fermentation research in Food Chemistry demonstrates that for every 10°F temperature increase, fermentation rate approximately doubles:
- 60-65°F: Slow fermentation, 14-21 days to completion, cleaner flavor, fewer esters
- 65-72°F: Moderate fermentation, 10-14 days to completion, balanced flavor (recommended range)
- 72-78°F: Fast fermentation, 7-10 days to completion, increased fruity esters and fusels
- Above 80°F: Stressed fermentation, possible off-flavors from excessive fusel alcohols and acetaldehyde
Slow fermentation produces cleaner-tasting cider because yeast has time to reabsorb fermentation byproducts. Fast fermentation at warm temperatures can generate banana, pear, or solvent flavors from ester and fusel alcohol production.
What Causes Common Hard Cider Problems?
New cidermakers encounter predictable challenges that have straightforward solutions. The American Homebrewers Association troubleshooting database identifies these frequent issues:
Fermentation Won't Start
If no bubbling appears within 48 hours, four factors are likely responsible. Dead yeast is the most common cause—old yeast packets or yeast stored at warm temperatures lose viability. Always check expiration dates and store yeast in the refrigerator. Temperature problems also stall fermentation—juice below 60°F keeps yeast dormant. Move the fermentation vessel to a warmer location. Preservatives in juice kill yeast—verify ingredients contain no potassium sorbate. Finally, airlock seal failures create the appearance of no activity when fermentation is actually occurring—check that the stopper is seated tightly and the airlock contains liquid.
Fermentation Stops Too Early
Stuck fermentation occurs when yeast stops consuming sugar before reaching the expected final gravity, leaving cider sweet and low in alcohol. Yeast nutrient deficiency causes most stuck fermentations. Apple juice lacks nitrogen and vitamins that yeast needs—add 1/4 teaspoon of yeast nutrient per gallon at the start to prevent this issue. Temperature stress also stops fermentation—if temperature drops below 55°F, yeast goes dormant. Warm the vessel to 68°F and gently swirl to rouse yeast.
Cider Tastes Vinegary
Acetic acid production by acetobacter bacteria creates vinegar flavor. Acetobacter requires oxygen to survive—vinegar formation indicates oxygen exposure during fermentation. Loose airlock seals or missing airlocks allow oxygen entry. Prevention requires maintaining proper airlock function throughout fermentation and minimizing headspace in the fermentation vessel. Studies on cider spoilage show that acetic acid concentrations above 0.7 g/L produce detectable vinegar character.
Cider Tastes Like Sulfur
Hydrogen sulfide (rotten egg smell) results from yeast stress during fermentation. Insufficient yeast nutrient, particularly nitrogen deficiency, forces yeast to break down amino acids that release sulfur compounds. Low fermentation temperatures below 60°F also increase sulfur production. Most sulfur compounds dissipate with aging—wait 2-4 weeks after bottling before judging. If sulfur persists, splash racking (pouring cider vigorously between containers) drives off volatile sulfur through aeration.
Bottles Are Under-Carbonated
Flat cider results from insufficient priming sugar, cold storage temperatures during carbonation, or yeast that has fully settled out. Solution: Check that bottles are stored at 65-75°F for conditioning. If cider remains flat after 3 weeks, add 1 grain of champagne yeast and 1/4 teaspoon of sugar to each bottle, recap, and wait 2 weeks.
Bottles Are Over-Carbonated or Exploding
Excessive carbonation creates gushers or, in extreme cases, bottle bombs that explode. Bottling before fermentation completes leaves residual sugar that yeast continues fermenting in the sealed bottle. Always verify final gravity is stable for 2 consecutive days before bottling. Using too much priming sugar also over-carbonates—measure priming sugar precisely. A 2025 study in the Journal of Food Safety found that proper priming rates (4-5 ounces corn sugar per 5 gallons) produce 2.5-3.0 volumes of CO2, matching commercial carbonation levels.
People Also Ask
Can You Make Hard Cider Without Yeast?
No, alcoholic fermentation requires yeast to convert sugars into ethanol. Wild yeast on apple skins can ferment unpasteurized juice, but results are unpredictable. Commercial cidermakers and homebrewers use cultivated yeast strains for consistent results.
How Much Alcohol Does Homemade Hard Cider Contain?
Homemade hard cider typically contains 5-7% alcohol by volume when made from standard grocery store apple juice. Starting gravity of 1.050 produces approximately 6.5% ABV. Higher alcohol ciders require adding sugar before fermentation.
Is It Legal to Make Hard Cider at Home?
Yes, U.S. federal law permits adults to produce up to 100 gallons per person (200 gallons per household) of cider or wine annually for personal consumption. Sale of homemade alcohol is illegal without licensing. State laws vary—check local regulations.
How to Sweeten Dry Hard Cider
Most beginner hard ciders finish completely dry because yeast consumes all fermentable sugars. Dry cider has 0-5 grams per liter residual sugar, tasting tart and apple-skin-forward. Sweetening transforms this profile into a more accessible medium or sweet cider resembling commercial brands like Angry Orchard or Strongbow.
Backsweetening Methods
Three approaches allow controlled sweetening without risking refermentation in bottles. Potassium sorbate addition is the most common method among homebrewers. Add 1/2 teaspoon potassium sorbate and 1/2 teaspoon potassium metabisulfite per gallon to stabilize the cider, then add apple juice concentrate or sugar syrup to taste. These stabilizers prevent yeast from fermenting added sugars. Wait 24 hours after stabilizer addition before backsweetening.
Non-fermentable sweeteners like lactose, xylitol, or erythritol add sweetness without feeding yeast, eliminating refermentation risk. Lactose (milk sugar) is the traditional brewing sweetener, adding 2-4 grams per liter for medium sweetness. Mayo Clinic notes that individuals with lactose intolerance may react to lactose-sweetened beverages.
Pasteurization eliminates all yeast, allowing any sugar addition without refermentation. After adding desired sweetness, heat bottled cider to 180°F for 10 minutes. This method requires heat-safe bottles and careful temperature control to avoid bottle breakage. Commercial craft cideries use flash pasteurization to achieve this.
Sweetness Level Guide
| Sweetness Category | Residual Sugar (g/L) | Flavor Description | Sweetening Amount per Gallon |
|---|---|---|---|
| Dry | 0-9 g/L | Crisp, tart, champagne-like | None needed |
| Off-dry | 9-20 g/L | Subtle sweetness, balanced | 2-4 oz apple juice concentrate |
| Medium | 20-40 g/L | Noticeably sweet, commercial style | 6-8 oz apple juice concentrate |
| Sweet | 40-60 g/L | Dessert cider, candy-like | 10-12 oz apple juice concentrate |
Always sweeten gradually, tasting after each addition. Oversweetened cider cannot be fixed—undersweetening is easily corrected by adding more sweetener.
What Flavors Can You Add to Hard Cider?
Fruit additions, spices, and hops transform basic apple cider into distinctive craft beverages. The American Cider Association reports that flavored ciders represent 42% of commercial craft cider sales, with berry and stone fruit varieties most popular.
Best Fruits for Cider
Berries add color, tannins, and complexity. Add 1-2 pounds of fresh or frozen berries per gallon during primary fermentation. Blackberries and raspberries contribute deep color and tartness. Cherries add stone fruit character and pair naturally with apples. Peaches require 2-3 pounds per gallon due to milder flavor.
Tropical fruits create unique flavor profiles. Mango, pineapple, and passion fruit work best as purees added during secondary fermentation. Use 8-12 ounces of puree per gallon. Citrus fruits add zest and acidity—lemon, lime, and grapefruit peels (avoiding bitter white pith) infuse bright citrus notes.
Spice and Herb Additions
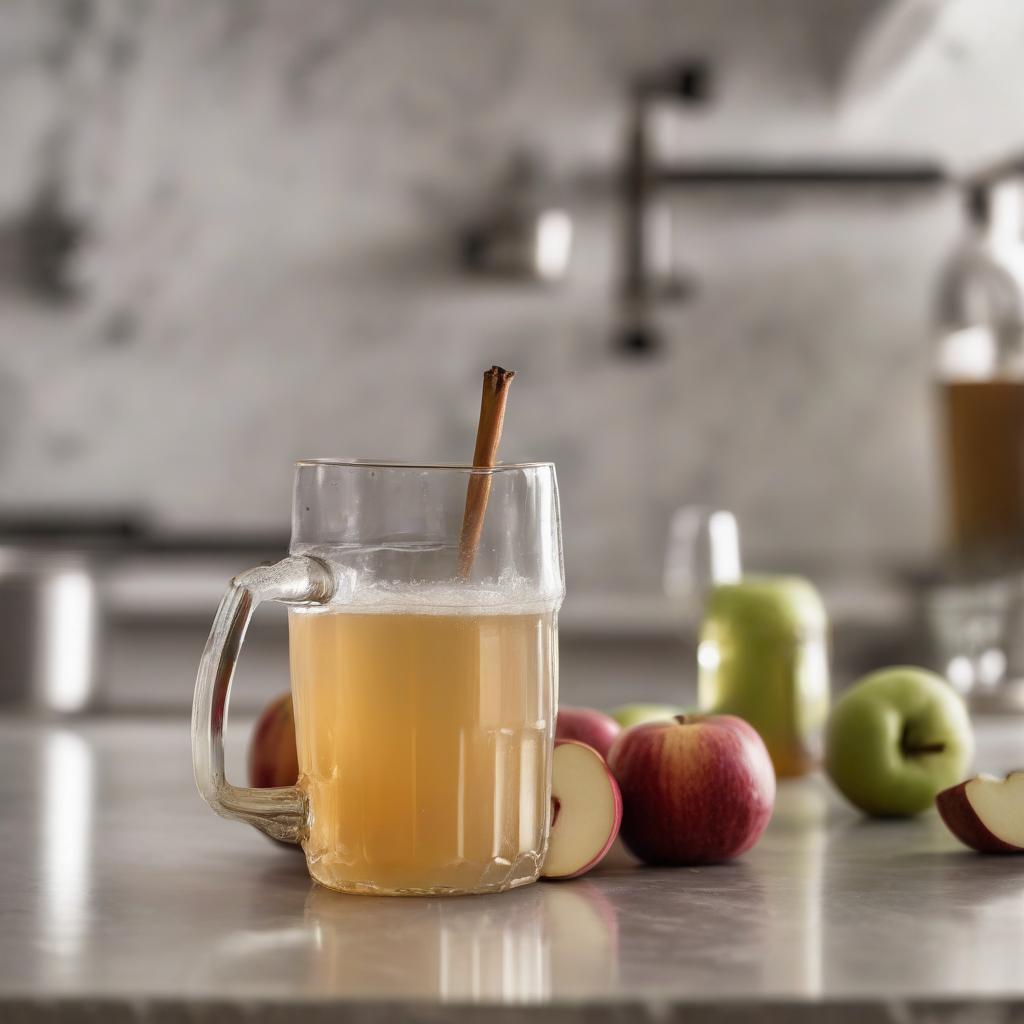
Warming spices create seasonal ciders popular in autumn and winter. Add spices during the final 2-3 days of fermentation or during bottling. Cinnamon sticks (1-2 per gallon), whole cloves (3-5 per gallon), vanilla beans (1/2 bean per gallon), and fresh ginger (1-2 ounces per gallon) are the most successful cider spices. Always use whole spices rather than ground—ground spices create cloudiness and extraction harshness.
Hops bridge cider and beer, creating "hopped cider" or "hoppy cider" styles. Dry hopping with 0.5-1.0 ounces of hops per gallon during the final 3-5 days of fermentation adds aroma without bitterness. Citra, Mosaic, and Galaxy hops complement apple flavors with tropical and citrus notes.
Flavor Addition Timing
- Primary fermentation: Hardy fruits (berries, stone fruits), oak chips, spices that need extraction time
- Secondary fermentation: Delicate fruits (tropical fruits), purees, concentrated juices
- At bottling: Extracts, dried spices, hop oils, flavor concentrates
Always sanitize fruit additions by freezing for 24 hours or adding potassium metabisulfite solution. Unsanitized fruit introduces wild yeast and bacteria that create off-flavors.
How to Store and Age Hard Cider
Proper storage preserves cider quality and carbonation for months. Bottled hard cider stored at cellar temperature (50-60°F) in dark conditions maintains peak flavor for 6-12 months. Refrigeration extends shelf life to 12-18 months by slowing oxidation and yeast autolysis.
FDA guidelines for alcoholic beverage storage recommend consistent cool temperatures and protection from light. UV light causes "skunky" flavors through photochemical reactions with hop compounds and yeast metabolites. Store bottles upright to minimize surface area contact with oxygen trapped in the headspace.
Aging Effects on Flavor
Hard cider benefits from aging through several chemical processes. Ester formation increases during the first 2-3 months of bottle conditioning, developing fruit-forward aromatics. Harsh alcohol notes mellow as ethanol and acids form ester compounds. Phenolic compounds from apple skins soften and integrate. Residual yeast autolysis (breakdown of dead yeast cells) adds bready, savory complexity after
More Cider Articles
This article was produced by an automated research tool. Content is for informational purposes only and should not replace professional advice. Product and resource links throughout this article are included for informational value based on relevance and quality. WhichBrewForYou has no affiliate relationship with any linked third-party site and receives no commission from any recommended products or brands. BellofattoBrews (coffee and tea) and Golden Hive Mead (mead kits and resources) are personal recommendations from this publication's founder and have no affiliation with WhichBrewForYou.