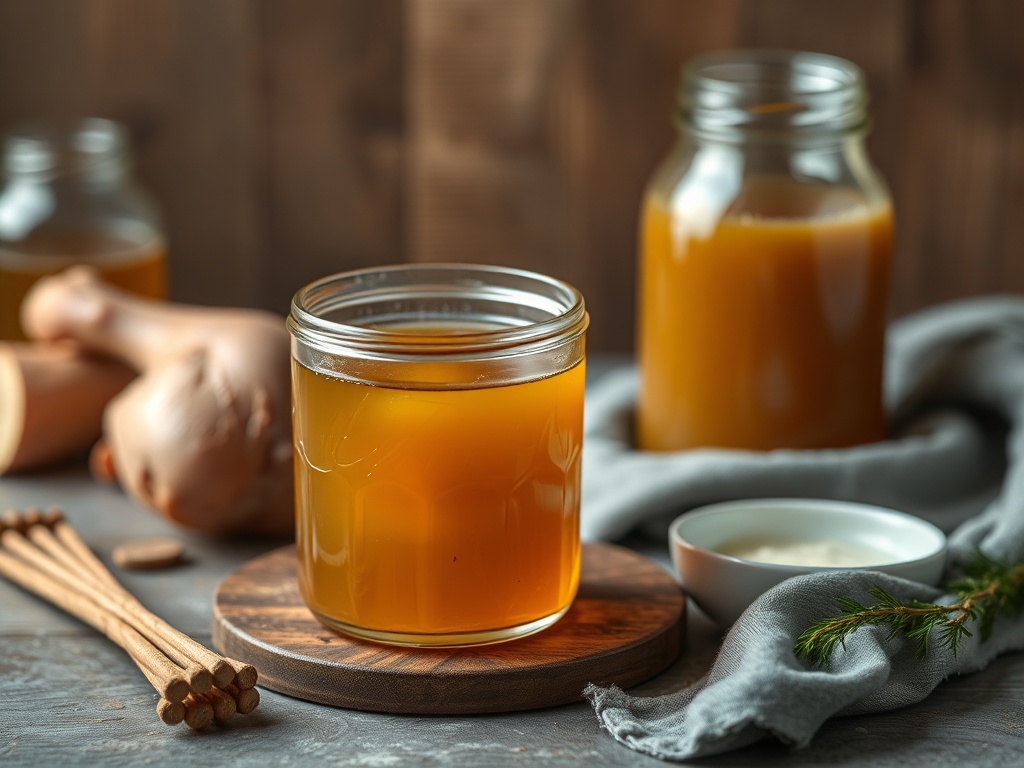
Key Takeaways
- Chicken bone broth requires 12-24 hours of gentle simmering to fully extract collagen and minerals from bones and connective tissue.
- Apple cider vinegar (2 tablespoons per gallon of water) is essential for drawing calcium and other minerals from bones into the liquid.
- Properly made bone broth will gel when refrigerated due to high collagen content, a key quality indicator according to nutritional research.
- Using feet, necks, and backs alongside standard carcass bones maximizes gelatin yield and creates a more nutrient-dense final product.
- Maintaining a bare simmer (180-200°F) rather than a rolling boil prevents cloudiness and preserves delicate amino acids.
What Makes Chicken Bone Broth Different from Regular Stock?
Chicken bone broth differs from standard stock through extended cooking time and intentional nutrient extraction. While stock typically simmers for 3-4 hours, bone broth requires 12-24 hours to break down collagen-rich connective tissue and leach minerals from bone matrix.
The finished product exhibits distinctive physical characteristics. Properly made bone broth forms a firm gel when refrigerated, similar to unsweetened Jell-O, indicating successful collagen extraction. This gelatinous texture comes from hydrolyzed collagen molecules that transform into gelatin during cooking.
Regular stock uses primarily meat and some bones for flavor extraction, while bone broth prioritizes bones, joints, cartilage, and connective tissue. The addition of acidic medium—typically apple cider vinegar—creates an environment that pulls calcium, magnesium, phosphorus, and trace minerals from bone structure into solution. A study in the Food Chemistry journal found that cooking time and vinegar addition significantly increased calcium and magnesium content in bone broths compared to shorter-cooked stocks.
How to Choose the Best Bones for Chicken Bone Broth
The ideal bone selection combines structural bones, cartilage-rich joints, and collagen-dense tissues. Chicken feet, necks, backs, and wings provide the highest collagen concentration due to their abundance of connective tissue and cartilage. Feet specifically contain extraordinary amounts of gelatin precursors—their skin and tendons break down into thick, viscous broth that solidifies firmly when chilled.
Whole chicken carcasses from roasted birds make excellent bone broth bases because they include remnant meat, skin, and most importantly, intact joints where cartilage concentration is highest. The knuckles, wing joints, and hip sockets contain glycosaminoglycans—complex carbohydrates that contribute to the broth's mineral profile and potential joint-supporting properties.
According to Kettle & Fire's bone broth education resources, mixing bone types creates the most balanced nutrient profile. Marrow bones (leg bones) contribute fat-soluble vitamins and bone marrow nutrients, while knuckle and joint bones provide collagen. Backs and necks add both collagen and some meat for flavor depth. A typical batch might include: 2-3 pounds of backs/necks, 1 pound of feet, and 1 whole carcass from a roasted chicken.
| Bone Type | Primary Contribution | Collagen Content | Best Source |
|---|---|---|---|
| Chicken Feet | Maximum gelatin extraction | Very High | Asian markets, specialty butchers |
| Necks | Collagen + flavor balance | High | Grocery meat departments |
| Backs | Flavor + moderate gelatin | Moderate | Butcher shops, whole chicken breakdown |
| Wings | Collagen + accessible gelatin | High | All grocery stores |
| Whole Carcass | Complete nutrient spectrum | Moderate-High | Post-roasted chicken leftovers |
Sourcing matters for both flavor and nutrient density. Pasture-raised or organic chicken bones typically come from birds with better diet quality and living conditions, which may influence the nutritional composition of their bones and tissues. While USDA organic certification doesn't guarantee superior bone broth nutrition, it does ensure the birds weren't exposed to antibiotics or conventional pesticides through feed.
What Equipment Do You Need for Making Bone Broth?
A large stockpot or slow cooker forms the foundation of bone broth equipment. For stovetop preparation, an 8-12 quart stainless steel or enameled cast iron pot allows batch sizes sufficient to justify the 24-hour cooking commitment. The pot must maintain even heat distribution and have a heavy bottom to prevent scorching during extended cooking. Dutch ovens work exceptionally well because their thick walls and tight-fitting lids minimize evaporation and maintain consistent low temperatures.
Slow cookers offer convenience for overnight or all-day simmering without constant monitoring. A 6-8 quart capacity slow cooker accommodates approximately 3-4 pounds of bones with adequate water coverage. The low setting on most slow cookers maintains the ideal 180-200°F temperature range that extracts nutrients without causing rapid boiling that clouds the broth and breaks down delicate compounds.
Pressure cooking and Instant Pot methods dramatically reduce cooking time—2-4 hours under pressure extracts similar gelatin and mineral content to 24 hours of conventional simmering. Research from NCBI studies on pressure cooking shows that high-pressure environments accelerate collagen breakdown while preserving heat-sensitive nutrients that might degrade during ultra-long cooking times. However, traditional slow-cooking advocates argue that gentle extraction produces superior flavor complexity.
Essential supplementary equipment includes:
- Fine-mesh strainer or cheesecloth for crystal-clear broth filtration
- Large metal spoon or ladle for skimming foam and fat
- Mason jars or BPA-free containers with tight lids for refrigerated storage
- Fat separator (optional) for removing surface fat before storage
- Kitchen thermometer for monitoring temperature precision
- Roasting pan if pre-roasting bones for enhanced flavor
Glass storage containers are preferable to plastic for hot liquid handling and long-term freezer storage. Wide-mouth quart jars make freezing convenient—leave 1-2 inches of headspace to accommodate expansion as the liquid freezes. Label containers with preparation date; frozen bone broth maintains quality for 4-6 months according to FDA food storage guidelines.
Step-by-Step: How to Make Chicken Bone Broth
This master recipe produces approximately 3-4 quarts of gelatinous bone broth. The process requires minimal active time but substantial passive cooking duration.
Ingredients for Classic Chicken Bone Broth
- 3-4 pounds chicken bones (combination of feet, necks, backs, wings, or whole carcass)
- 2 tablespoons raw apple cider vinegar
- 1 gallon (16 cups) filtered water, plus more as needed
- 2 medium carrots, roughly chopped (optional for flavor)
- 2 celery stalks with leaves, roughly chopped (optional)
- 1 large onion, quartered with skin (adds color and quercetin)
- 4-5 garlic cloves, smashed (optional)
- 2 bay leaves
- 1 tablespoon whole black peppercorns
- Fresh herbs: parsley, thyme, or rosemary (add in final 30 minutes)
- 1-2 teaspoons sea salt (add after cooking or to taste)
Preparation Method
- Prepare the bones (optional but recommended): Preheat oven to 400°F. Spread chicken bones on a roasting pan in a single layer. Roast for 30-40 minutes until golden brown and aromatic. This caramelization step deepens flavor through Maillard reaction and adds visual color to the finished broth. Skip this step if using leftover roasted chicken carcass.
- Initial setup: Place roasted (or raw) bones in your stockpot or slow cooker. Add apple cider vinegar first—this acidic pre-soak begins mineral extraction even before heating begins. Let bones sit with vinegar for 20-30 minutes.
- Add water and vegetables: Pour cold filtered water over bones until covered by 1-2 inches. Add carrots, celery, onion, garlic, bay leaves, and peppercorns. Do not add salt yet—salt can draw moisture from vegetables and concentrate too much as water evaporates over 24 hours.
- Bring to initial boil: Heat on high until liquid just begins to boil. This typically takes 30-45 minutes depending on water volume and heat source. As temperature rises, foam and impurities rise to the surface.
- Skim the surface: Once boiling, a gray-brown foam appears on the surface. Skim this scum thoroughly with a large spoon or ladle. This removal creates clearer, cleaner-tasting final broth. After skimming, immediately reduce heat.
- Reduce to bare simmer: Lower heat until just tiny bubbles occasionally break the surface. The ideal temperature range is 180-200°F—hot enough to extract collagen but gentle enough to prevent emulsifying fat into the liquid (which causes cloudiness). For slow cookers, switch to low setting. This gentle simmer is the most critical factor in producing clear, gelatin-rich bone broth according to culinary science research.
- Simmer duration: Cook for minimum 12 hours, preferably 18-24 hours. Check periodically and add hot water if bones become exposed—they must remain submerged for complete extraction. The extended cooking gradually breaks down collagen triple-helix structures into individual gelatin molecules.
- Add fresh herbs: In the final 30-45 minutes, add fresh parsley, thyme, or rosemary. Adding delicate herbs too early causes them to disintegrate and can impart bitter or overly grassy flavors. This timing preserves their aromatic volatile compounds.
- Strain thoroughly: Turn off heat. Using tongs, remove large bones and vegetables. Pour broth through fine-mesh strainer lined with cheesecloth into a large bowl or secondary pot. For restaurant-quality clarity, strain twice. Discard solids—after 24 hours of simmering, bones become soft and brittle as minerals have been extracted into the broth.
- Cool and store: Let broth cool at room temperature for 1 hour, then transfer to refrigerator. As it chills, fat rises and solidifies on top in a white layer that's easily removable with a spoon. Beneath this fat cap, properly made bone broth should form a firm, jiggly gel. This gel consistency confirms successful collagen extraction—if broth remains completely liquid when cold, cooking time was insufficient or collagen-rich bones weren't used.
Troubleshooting Common Issues
If bone broth doesn't gel when refrigerated, several factors may be responsible. Insufficient collagen-rich bones (particularly lack of feet, joints, or cartilage) is the most common cause. Cooking time under 12 hours rarely produces strong gel. Excessive dilution—too much water relative to bones—spreads gelatin molecules too thinly to form matrix structure when cooled. The solution: use more collagen-dense bones, cook longer, or use less water in the next batch.
Cloudy broth results from boiling rather than simmering. Rapid bubbling emulsifies fat droplets and suspended proteins throughout the liquid. Always maintain gentle simmer below 200°F. Cloudiness doesn't affect nutritional value but impacts visual appeal and can create slightly greasy mouthfeel.
Bitter or off flavors indicate vegetables cooked too long. Root vegetables and aromatics contribute flavor in the first 8-12 hours but can turn bitter or develop sulfur notes after 18+ hours. Consider adding vegetables only in the final 4-6 hours of cooking, or remove them after 8 hours and continue bone extraction alone.
Why Apple Cider Vinegar Is Essential in Bone Broth
Apple cider vinegar serves a critical biochemical function beyond flavor contribution. The acetic acid in vinegar creates a mildly acidic environment (pH 5-6) that facilitates calcium, magnesium, and phosphorus release from bone mineral matrix. Bone is composed of calcium phosphate crystals embedded in collagen protein—acid exposure helps dissolve these mineral crystals into ionic form that enters the liquid.
Research published in the Food Chemistry journal demonstrated that bone broths prepared with acidic medium contained significantly higher calcium and magnesium concentrations compared to those cooked with water alone. The study tested various acids and found that 2 tablespoons of vinegar per gallon of water optimized mineral extraction without imparting strong acidic taste to the finished product.
The 20-30 minute pre-soak with vinegar before heating begins allows acid to start working on bone surface before temperature accelerates the reaction. During this rest period, you can observe very fine bubbles forming on bone surfaces—this is carbon dioxide release as calcium carbonate reacts with acetic acid, early evidence that mineral extraction has initiated.
Any vinegar with 5% acidity works, but raw unfiltered apple cider vinegar is preferred by traditional bone broth makers. The "mother" (cloudy sediment in raw ACV) contains beneficial bacteria and enzymes, though these are unlikely to survive 24 hours at 180°F. White wine vinegar or fresh lemon juice (3 tablespoons per gallon) are acceptable substitutes. Avoid balsamic or flavored vinegars that can dominate the delicate chicken flavor.
How Long Should You Simmer Chicken Bone Broth?
The optimal simmering duration for chicken bone broth ranges from 12 to 24 hours, with most practitioners targeting 18-20 hours. This extended timeframe allows complete collagen hydrolysis—the breaking down of large collagen molecules into smaller gelatin peptides that dissolve into the liquid. According to Bare Bones Broth's educational content, the gelatin extraction curve is steep in the first 8 hours, plateaus between 12-18 hours, and shows diminishing returns after 24 hours.
Chicken bones are less dense than beef bones and require shorter cooking times. Beef bone broth typically needs 24-48 hours because bovine bones are larger and denser with thicker cortical bone structure. Chicken bones, being smaller and more porous, release their nutrients more readily. After 24 hours, chicken bones become so soft they can be crushed between fingers—at this point, mineral extraction is essentially complete.
Minimum cooking time is 12 hours. Anything shorter produces a product closer to rich stock than true bone broth. The gel test—firm gelatin formation when refrigerated—rarely occurs with cooking times under 12 hours unless using exceptionally high ratios of feet to other bones. Most home cooks find 18 hours provides the best balance of maximum extraction without requiring a second overnight cooking session.
Pressure cooking condenses this timeline dramatically. An Instant Pot set to high pressure for 3 hours produces gelatin-rich broth comparable to 18-24 hours of conventional simmering. The elevated pressure (approximately 250°F internal temperature) accelerates collagen breakdown exponentially. For time-constrained cooks, pressure cooking offers legitimate bone broth benefits in a fraction of the time.
| Cooking Method | Minimum Time | Optimal Time | Pros | Cons |
|---|---|---|---|---|
| Stovetop | 12 hours | 18-24 hours | Traditional flavor depth, precise temperature control | Requires monitoring, uses continuous energy |
| Slow Cooker | 12 hours | 18-24 hours | Set-and-forget convenience, even heat | Limited batch size, less evaporation control |
| Pressure Cooker | 2 hours | 3-4 hours | Dramatically faster, energy efficient | Less flavor complexity, fixed capacity |
| Oven (covered pot) | 12 hours | 18-20 hours | Even heat distribution, frees stovetop | Uses oven space, energy intensive |
Signs that bone broth is finished include bones that break easily when pressed, cartilage and connective tissue that have completely disintegrated, and the development of rich, deep color. The liquid should have noticeably reduced in volume through evaporation—expect 15-25% reduction depending on pot size and lid fit. When a spoonful cools on a plate for a few minutes, it should begin to thicken slightly, forecasting the gel formation that will occur during refrigeration.
What Temperature Should Bone Broth Simmer At?
The ideal simmering temperature for bone broth is between 180-200°F (82-93°C). This range provides sufficient heat to hydrolyze collagen and extract minerals while avoiding the problems caused by vigorous boiling. At true boiling temperature (212°F at sea level), several negative effects occur: rapid evaporation requiring constant water addition, emulsification of fat and proteins that clouds the broth, and potential degradation of heat-sensitive amino acids.
Professional chefs and bone broth producers monitor temperature carefully. Kettle & Fire's bone broth production guidelines specify that commercial batches are held at 185°F for optimal gelatin extraction with minimal water loss. At this temperature, you should see occasional small bubbles rising from the bottom and gentle movement on the surface, but never a rolling boil.
The visual cue is "lazy bubbles"—one or two bubbles breaking the surface every few seconds, steam rising steadily, and liquid that shivers but doesn't churn. If your pot is producing continuous streams of bubbles or creating waves across the surface, the heat is too high. Conversely, if the surface is completely still with no steam and you can hold your hand an inch above the liquid comfortably, temperature is too low for efficient extraction.
Temperature control is simpler with slow cookers, where the low setting naturally maintains 180-190°F, and high setting runs 200-210°F—the low setting is preferable for traditional bone broth. Stovetop cooking requires burner adjustment, especially in the first hour as the pot reaches equilibrium. Electric ranges provide more stable low-temperature control than gas burners, which tend to run hot even on the lowest setting.
For precision-focused cooks, a clip-on kitchen thermometer with an alarm provides peace of mind during overnight cooking. Set the alarm for 205°F—if temperature creeps above this threshold, the heat needs reduction. Some bone broth enthusiasts use sous vide circulators set to 180°F for perfectly consistent temperature over 24 hours, though this is equipment overkill for most home applications.
Should You Roast Bones Before Making Bone Broth?
Roasting bones before simmering is optional but strongly recommended for superior flavor and visual appeal. The high-heat roasting process caramelizes proteins, rendering fat, and creating Maillard reaction compounds—these are the same browning reactions that make roasted meat taste dramatically different from boiled meat. A bone broth made from roasted bones develops deep amber color and rich, complex flavor compared to the pale, milder broth from raw bones.
The roasting process takes 30-45 minutes at 400°F. Spread bones in a single layer on a rimmed baking sheet or roasting pan. Avoid crowding—bones need air circulation to brown rather than steam. Roast until visibly golden-brown with some darkened edges, turning once halfway through. The rendered fat and caramelized bits stuck to the pan (fond) should be added to the stockpot—these concentrated flavors contribute significantly to the finished broth depth.
From a nutritional perspective, roasting doesn't significantly alter the mineral or collagen content available for extraction. However, some research suggests that Maillard reaction products may have antioxidant properties. A study in PubMed on Maillard reaction compounds found that moderate browning creates melanoidins with antioxidant activity, though excessive charring can produce potentially harmful compounds. The key is golden-brown roasting, not blackened charring.
Time-pressed cooks can skip roasting when using leftover carcasses from already-roasted chickens—these bones have undergone the browning process during the initial roasting for dinner. Raw bones from a butcher or purchased specifically for broth benefit most from pre-roasting. The flavor difference is substantial enough that most bone broth practitioners consider the extra 45 minutes worthwhile.
An alternative to oven roasting is stovetop browning. Heat a large pot with a thin layer of oil, add bones, and brown on all sides over medium-high heat. This method works well for necks and wings but is impractical for whole carcasses. The advantage is one-pot cooking with less cleanup, though heat distribution is less even than oven roasting.
Which Vegetables and Aromatics Should You Add?
Classic bone broth aromatics include carrots, celery, onions, and garlic—the French mirepoix foundation that forms the base of countless stocks and broths. These vegetables contribute glutamates (natural umami compounds), subtle sweetness from carrot sugars, aromatic complexity from celery phthalides, and sulfurous depth from onion and garlic alliums. However, vegetables are entirely optional in bone broth—the primary goal is nutrient and collagen extraction from bones, not vegetable flavor.
The ratio and timing matter. Too many vegetables, especially carrots, can create overly sweet broth that masks the natural chicken flavor. A general guideline is no more than 2 cups of total aromatic vegetables per gallon of water. Onions can remain unpeeled—the papery skin adds golden color and contains quercetin, a flavonoid antioxidant.
Timing vegetables correctly prevents bitterness. Root vegetables and aromatics contribute their best flavor in the first 8-12 hours but can develop bitter or sulfurous notes during extended cooking. Professional bone broth makers often use a two-stage process: simmer bones alone for the first 12 hours to extract minerals and collagen, then add vegetables for the final 6-8 hours to layer in aromatic complexity without risking off-flavors.
Fresh herbs should always enter in the final 30-45 minutes. Parsley is traditional—its bright, grassy notes balance the rich bone flavors and contain vitamin K and volatile oils that dissipate quickly under heat. Thyme and rosemary work well with chicken, providing earthy, piney aromatics. Bay leaves can be added at the beginning as their tough structure withstands long cooking without bitterness. Avoid delicate herbs like basil, cilantro, or dill—these turn muddy and unpleasant in extended cooking.
- Essential aromatics (add at beginning): onion, garlic, bay leaves, peppercorns
- Optional vegetables (add at beginning or midway): carrots, celery, leeks, ginger
- Finishing herbs (add final 30-45 minutes): parsley, thyme, rosemary
- Avoid: cruciferous vegetables (cabbage, broccoli, Brussels sprouts—they create sulfurous off-flavors), tomatoes (excess acidity), bell peppers (bitter when overcooked)
Turmeric root (1-2 inches) colors the broth golden-yellow and contributes curcumin, though bioavailability without black pepper and fat is limited.
How to Store Chicken Bone Broth Safely
Proper storage preserves bone broth quality and prevents bacterial growth. After straining, cool broth rapidly to minimize time spent in the bacterial danger zone (40-140°F). The two-stage cooling method works best: let the pot cool at room temperature for 30-60 minutes, then transfer to shallow containers and refrigerate immediately. Shallow, wide containers (2-3 inches deep) cool faster than tall, narrow ones because they have greater surface area relative to volume.
In the refrigerator, bone broth remains safe for 4-5 days. The fat cap that solidifies on top creates a natural protective barrier that reduces oxygen exposure and helps prevent spoilage. Don't remove this fat until ready to use—it acts as a preservative. When stored properly, the broth beneath the fat layer should remain firmly gelled and smell clean and pleasantly savory. Any off-odors, mold, or discoloration indicate spoilage and the batch should be discarded.
For longer storage, freezing is essential. Bone broth freezes exceptionally well for 4-6 months without quality degradation. Use freezer-safe glass jars (wide-mouth Mason jars work perfectly), BPA-free plastic containers, or silicone ice cube trays for portioned servings. When using glass jars, leave 1-2 inches of headspace at the top—water expands approximately 9% when frozen and insufficient headspace can crack glass containers.
The fat cap should be removed before freezing because fat texture degrades more quickly than the broth itself, potentially developing rancid flavors after 2-3 months frozen. Save the rendered chicken fat separately—it's excellent for cooking vegetables or making confit.
| Storage Method | Duration | Best Container | Notes |
|---|---|---|---|
| Refrigerator (with fat cap) | 4-5 days | Glass jars or covered pot | Do not remove fat cap until use |
| Refrigerator (without fat cap) | 3-4 days | Airtight containers | More susceptible to oxidation |
| Freezer (portioned) | 4-6 months | Silicone ice trays, then transfer cubes to freezer bags | Convenient for recipes calling for small amounts |
| Freezer (bulk) | 4-6 months | Wide-mouth quart jars or BPA-free containers | Label with date, leave 1-2" headspace |
| Canned (pressure canning) | 1-2 years | Mason jars, pressure canner required | Must follow USDA canning guidelines exactly |
Thawing frozen bone broth overnight in the refrigerator is the safest method. For faster thawing, place the sealed container in a bowl of cold water, changing water every 30 minutes. Never thaw bone broth at room temperature—bacteria multiply rapidly in the danger zone. Microwave thawing works for immediate use but can create hot spots that degrade texture. Bone broth can also be reheated directly from frozen—simply place the frozen block in a pot over low heat and
This article was produced by an automated research tool. Content is for informational purposes only and should not replace professional advice. Nothing here is medical advice, and it is not a substitute for it. Talk to a doctor about anything affecting your health. Product and resource links throughout this article are included for informational value based on relevance and quality. WhichBrewForYou has no affiliate relationship with any linked third-party site and receives no commission from any recommended products or brands. BellofattoBrews (coffee and tea) and Golden Hive Mead (mead kits and resources) are personal recommendations from this publication's founder and have no affiliation with WhichBrewForYou.